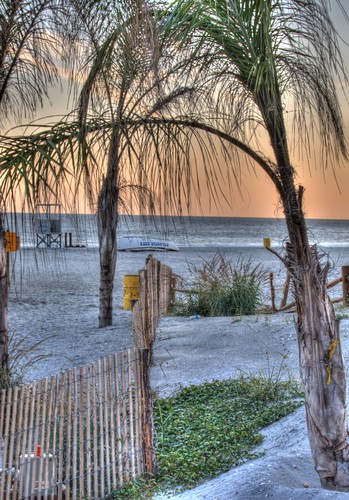
Have you heard of talk of HDR images, but aren't quite sure what it means? Have you run into a situation where you want to capture a scene with very bright and very dark areas? If so, then you may want to see if HDR images will be a good fit. Creating them is not as difficult as you might think. Today's post is not intended as a tutorial on how to create HDR images, but rather to introduce those to what these images are and how they are created.
HDR stands for High Dynamic Range. The basic idea of HDR photography is that you combine several photos of the same scene into one image that properly (what "properly" means is left to the judgment of the photographer) exposes a wider range of light and dark than a single image would include. This is accomplished by taking a series of pictures at different exposures, some under-exposed, some over-exposed, and some close to what the camera light meter would regard as "correct." Typically, HDR images will include a series of three photographs, but some scenes call for seven, nine, or occasionally more exposures. A variety of software programs (I use Photomatix) can then combine those series of images into one and offer a handful of built-in images and a myriad of options for processing. Like many aspects of photography, you can quickly create images or spend hours processing, depending on your comfort level with the software and how picky you are about your finished product. A few minutes in Photomatix (or similar software) can create a pretty stunning image, while the incremental gains from spending more time in the software may only be appreciated by you or a few people who will see your image. Whether or not that is important, is up to you.
Let's take a look at a couple examples
EXAMPLE #1
Take a look at the image below. It was created by taking three pictures on my digital SLR camera and combining them in Photomatix. This image used one of the built-in Photomatix templates, with no further processing, so it only took a few minutes for me to click through the choices built-in choices in the software and then save my final product.
Here are the three original pictures that were combined to create the final image. Look at how dark the shadows are in the first image and then notice how washed on the light areas are in the last image. HDR lets you take the "best" (obviously, that term is subjective) parts of each picture to create your finished product.
EXAMPLE #2
This next photograph is one of my favorites and was taken with my Canon Powershot point and shoot camera. It shows that you don't need an expensive DLSR camera to produce great results and/or to create HDR images.
This camera does have a "bracket" feature that automatically takes a series of three images at different exposures
One feature my point and shoot camera does include is the ability to "bracket" a scene. When this option is turned on, the camera will take three pictures, each exposed a little differently. Notice the different shades of orange in the sky from the three images below. Combine that with some of the brightness in the foreground and have end up with a more attractive final image.
You may also notice that I didn't hold the camera completely still for this series of pictures. Photomatix was able to adjust for the slightly different composition (look at the trees on the left or right of the screen to see how the camera moved) and automatically crop the part of the image that was the same in all three pictures.
EXAMPLE #3
This is one of my more ambitious HDR projects thus far. I was an image of the France pavilion in Walt Disney World's Epcot, taken a night. I wanted to capture the attractive fountains in the foreground, then lighted topiary near the center of the image, along with the faux-city streets and building surrounding the scene.
As you can see from the series of photographs I took, no one image shows the best of the whole scene. Since this required many pictures, each with long exposures, I used a tripod to be able to hold the camera still and pointed at the same place.
The fountains look great in the first image, but most of the rest of the scene is too dark. The last couple images illuminate some of the brickwork on the buildings, but there isn't much else that looks good. Some of the images in the middle look pretty good, but the windows and the fountains are much brighter/more washed out than I wanted.


I hope this gives folks an idea what HDR photography can look like. There are many more examples out there, but these illustrate how you can get started. Let us know if this helps and be sure to share what you've created!


